404 Error Pages
To access error pages, sign into the control panel and then click on the "Advanced Features" icon, followed by the "Custom Error Pages" link.
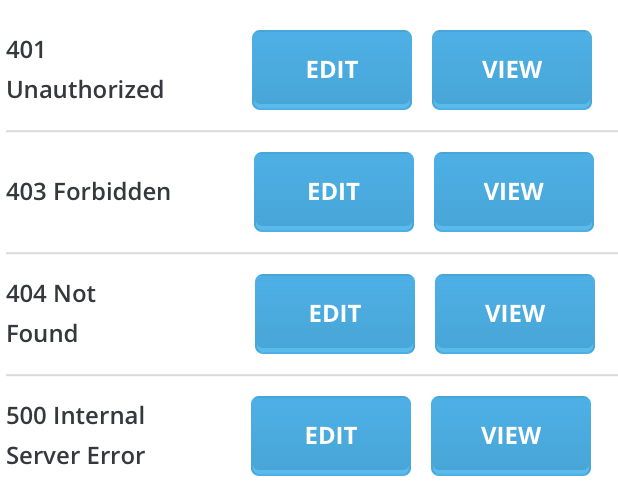
Error pages allow you to control what visitors see when they encounter these types of errors:
- 401 Unauthorized (the visitor does not have permission to view the file/directory)
- 403 Forbidden (access to the file/directory is not possible)
- 404 The file or directory is not found
- 500 An error occurred on the server
There is default text in custom error pages, which you can view by pressing "View" button or edit by pressing "Edit."
Changing the Error Pages
There are two ways to change the error pages:
Method 1:
From the Error Page menu, click the "Edit" button of the error page you want to edit (see picture above). A text box will appear, and you can paste your HTML code into that text box.
Method 2:
Create the files yourself in any HTML editor and upload them to your public_html directory. The files must have the .shtml extension. You can find more information about uploading and editing files here.
Directory Password Protection
To access "Password Protected Directories" menu, sign into the control panel and then click on the "Advanced Features" icon, followed by the "Password Protected Directories" link.
From there, you will see all password protected directories. You can press "Find a directory to Password Protect" link below directories table, to access protected directories in File Manager, or you can click on the directory name to edit desired password protected directory.
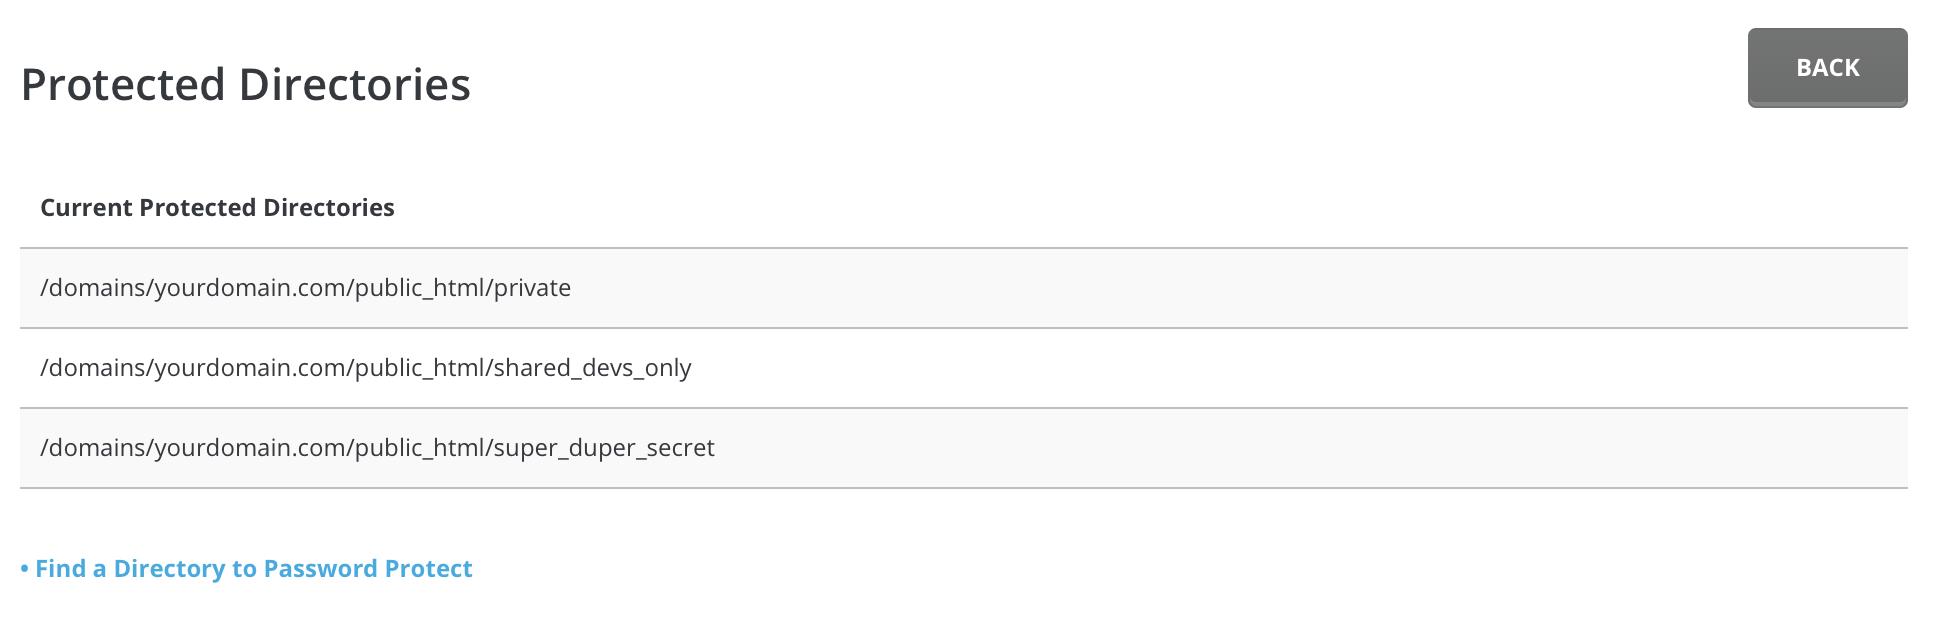
If you want to protect new directories, click on the "Find a directory to password Protect" link (see image above). Then click on the "+" button on the right of the desired folder and press "Protect" link.

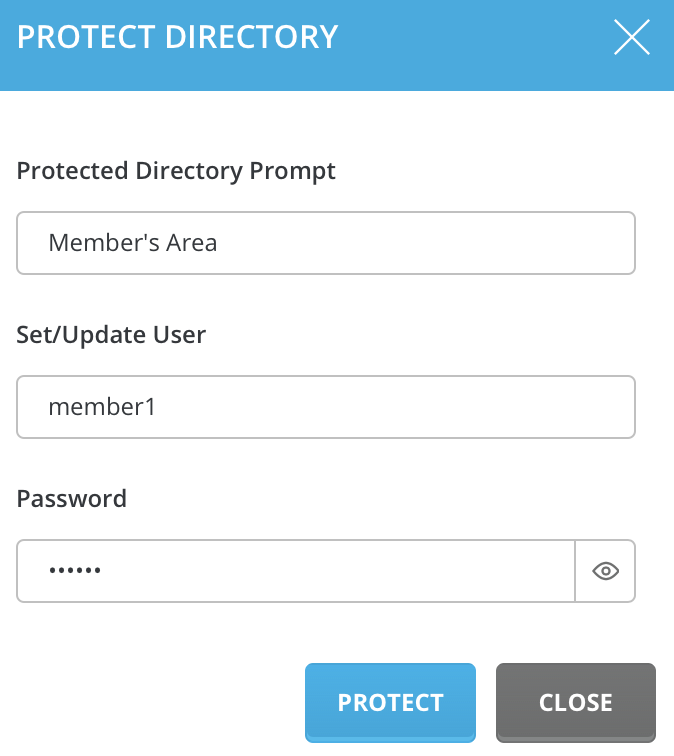
Fill in the Directory Prompt(a description of the password protected directory), the username for the directory, and the password for the directory. Click "Save."
Now, type the full address of the directory into your browser and see what happens.
Modifying Password Protected Directories
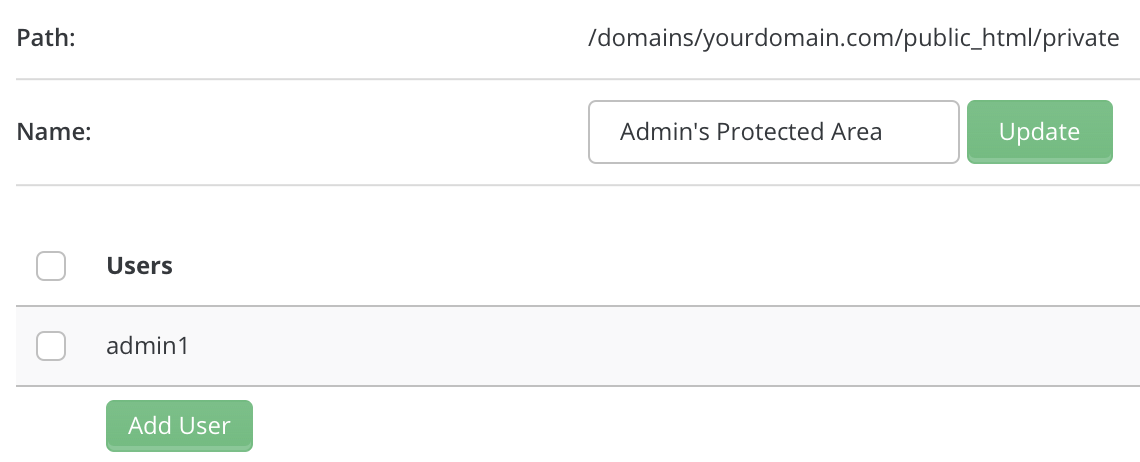
Click on the directory path to edit the directory. From here you may update directory name, add new or remove old directory users.
You can also remove protection from the directory by simply clicking "Remove Protection" button in the top right corner of the window.
Server Information
To access "Server Information" menu, sign into the control panel and then click on the "System Info & Files" icon, followed by the "Server Information" link.
The server information feature allows you to determine the memory usage of the server, uptime, CPU's information and the status of all services.
Cron Jobs
To access "Cronjobs" menu, sign into the control panel and then click on the "Advanced Features" icon, followed by the "Cronjobs" link.
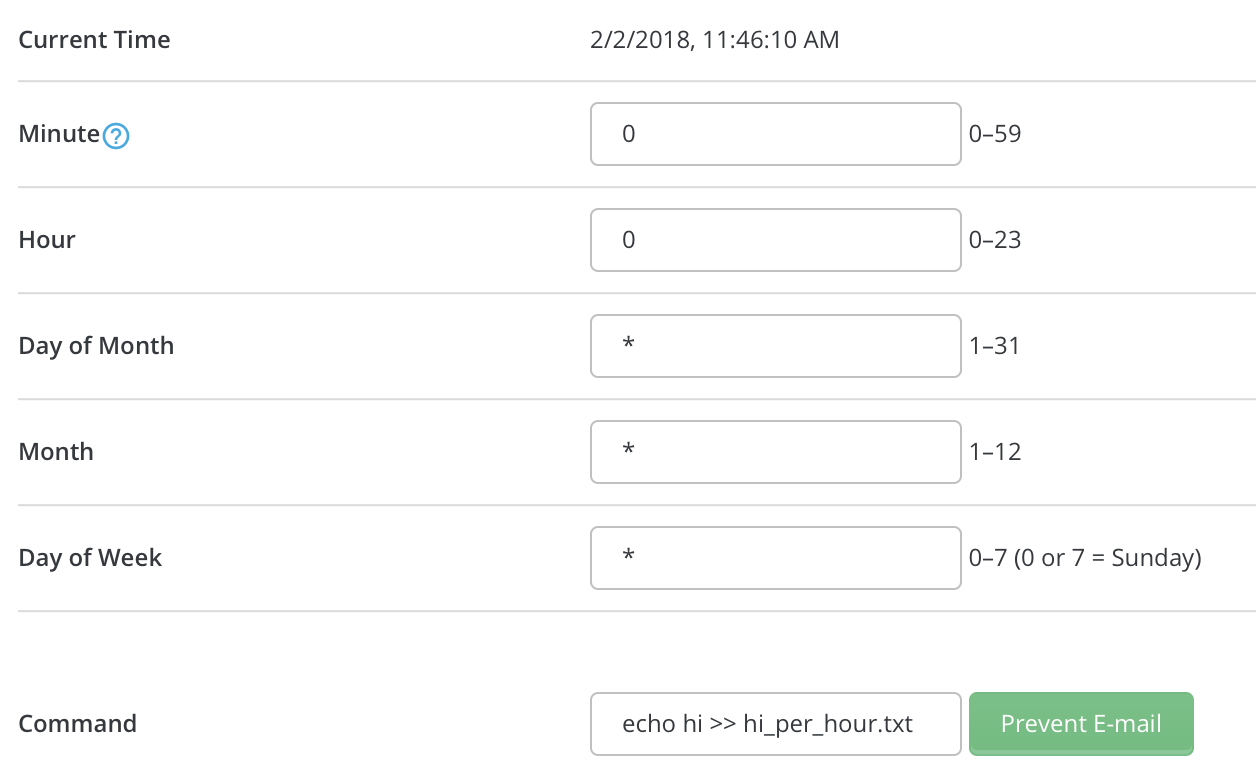
Cron jobs are system commands that can be scheduled. For example, if you wanted a "hi" value added to a text file every Monday morning, you could do this through the cron jobs menu. Values that can be set are minute, hour, day, month, and day of week (Monday-Sunday; the numbers 0 or 7 represent Sunday). Any value can be ignored by placing an asterisk (*) in the text field.
In the above example, we are setting command echo to put the word "hi" in hi_per_hour.txt file every day at midnight.
You can also specify exact times using commas to separate them (e.g. 1,2,3 is minutes 1, 2 and 3).
You can specify spans using a dash (e.g. 5-7 is minutes 5 to 7).
Furthermore, you can specify intervals using a star and a forward slash. (e.g.: */2 is every 2nd minute.)
You can combine them to create a more precise schedule. (e.g.: 1,5,11-15,30-59/2 (minutes 1, 5, 11 to 15 and every 2nd minute between 30 and 59).
Remember to click "Create" button below when you are finished entering your data.
If you're trying to run a PHP script, remember to run the PHP binary, and pass it to the PHP script. For example:
/usr/local/bin/php /home/user/domains/domain.com/public_html/file.html
Mime Types
To access "Mime Types" menu, sign into the control panel and then click on the "Advanced Features" icon, followed by the "Mime Types" link.
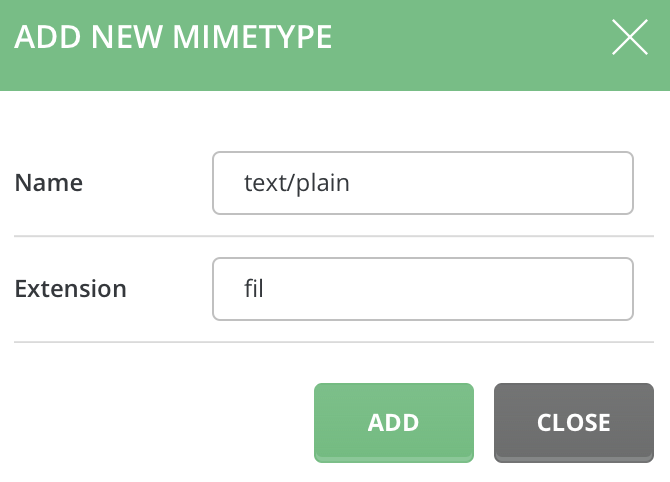
Mime types allow you to set how browsers open web files. To add a mime type, enter the mime type name and then the extension, without a period. Mime types (and Apache handlers – described next) should only be used by advanced users.
In the above example, web browsers would open *.fil files as plain text documents.
To add mime type, click on the "Add Mimetype" button.
At the bottom of the mime types menu is a link to the list of all mime types currently installed on the system.
Apache Handlers
To access "Apache Handlers" menu, sign into the control panel and then click on the "Advanced Features" icon, followed by the "Apache Handlers" link.
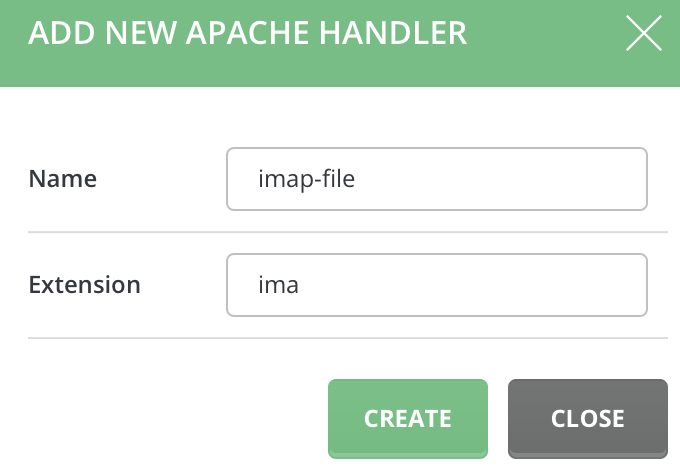
Handlers tell Apache (the web server software) what to do with certain types of files. For example, .cgi and .pl extensions are processed with Perl. You could make Apache process .scr files with Perl by using the appropriate handlers.
To add a handler, simply press "Create Handler" button then type in the handler name and extension (without a period) and click on “Create.”
In the above example, Apache would handle all .imap files as IMAP types, even though the default extension for image maps is .imap.
At the bottom of the apache handlers menu is a link to the list of all apache handlers currently installed on the system.
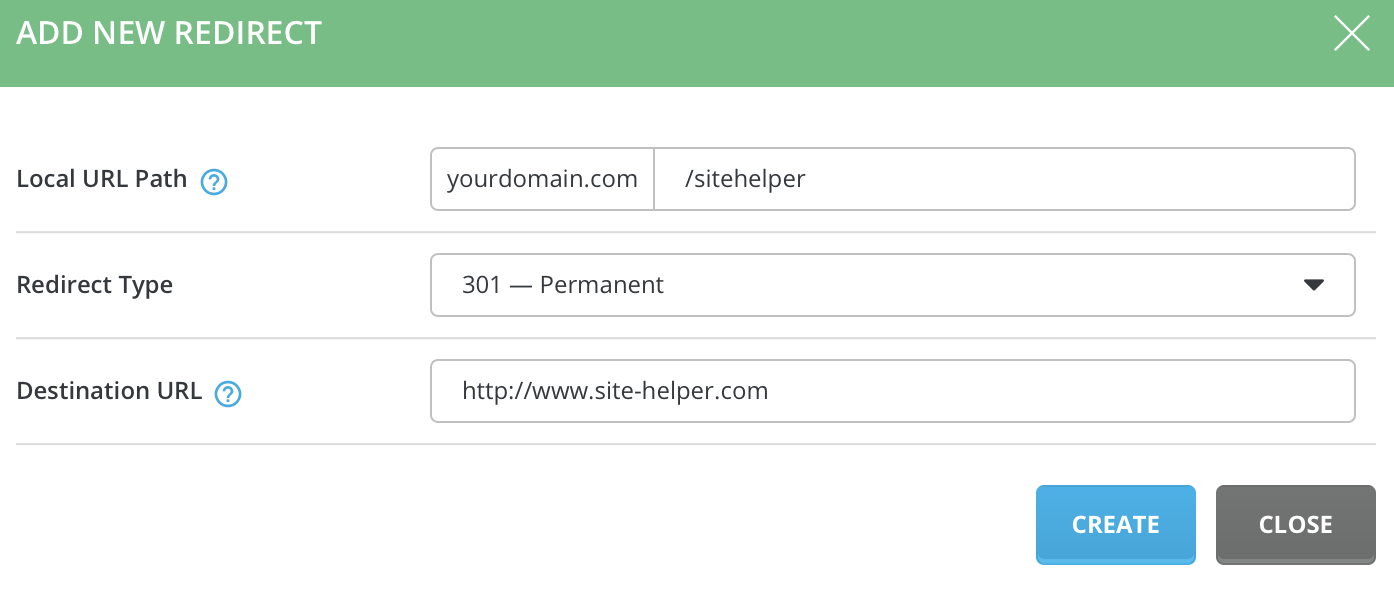
Site Redirection
To access "Site Redirection" menu, sign into the control panel and then click on the "Account Manager" icon, followed by the "Site Redirection" link.
Site redirection allows you to forward visitors to somewhere else on your site, or to another website altogether.
In the above example, visitors to http://yourdomain.com/sitehelper would be sent to http://www.site-helper.com.
Enter a slash (/) by itself in the "Local URL Path" field to forward all visitors from your domain (http://www.yourdomain.com) to the specified Destination URL.
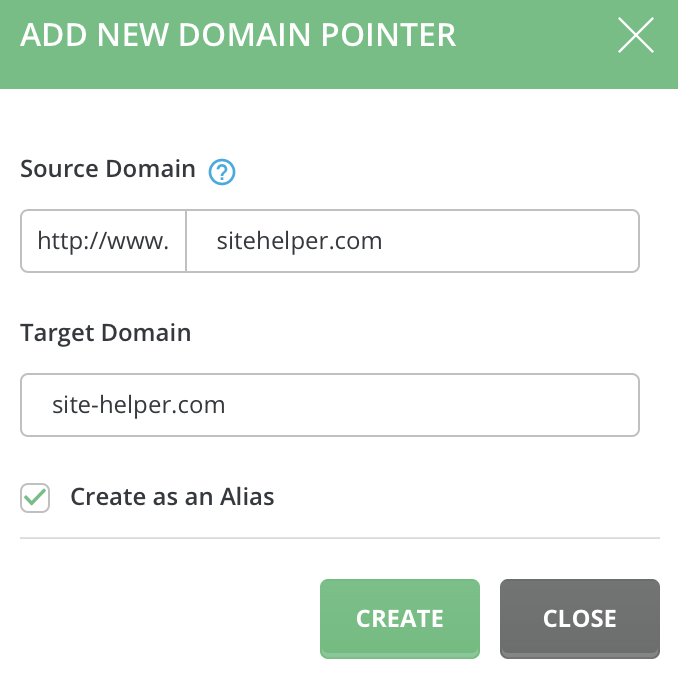
Domain Pointers
To access "Domain Pointers" menu, sign into the control panel and then click on the "Account Manager" icon, followed by the "Domain Pointers" link.
Domain pointers allow you to forward other domains to your main website. Make sure to change the records of these domains to the same name servers as your main website (this is done through the domain registrar).
Let's say we also own the domain sitehelper.com. In the example from right we are creating a pointer that makes all visitors to sitehelper.com end up at site-helper.com.
Select "Create as an Alias" box if you want users to see site-helper.com links instead of sitehelper.com in the browser.
Be sure to click "Create" when you are finished entering the source domain.
Note: It may take up to 72 hours for the pointer to become active.
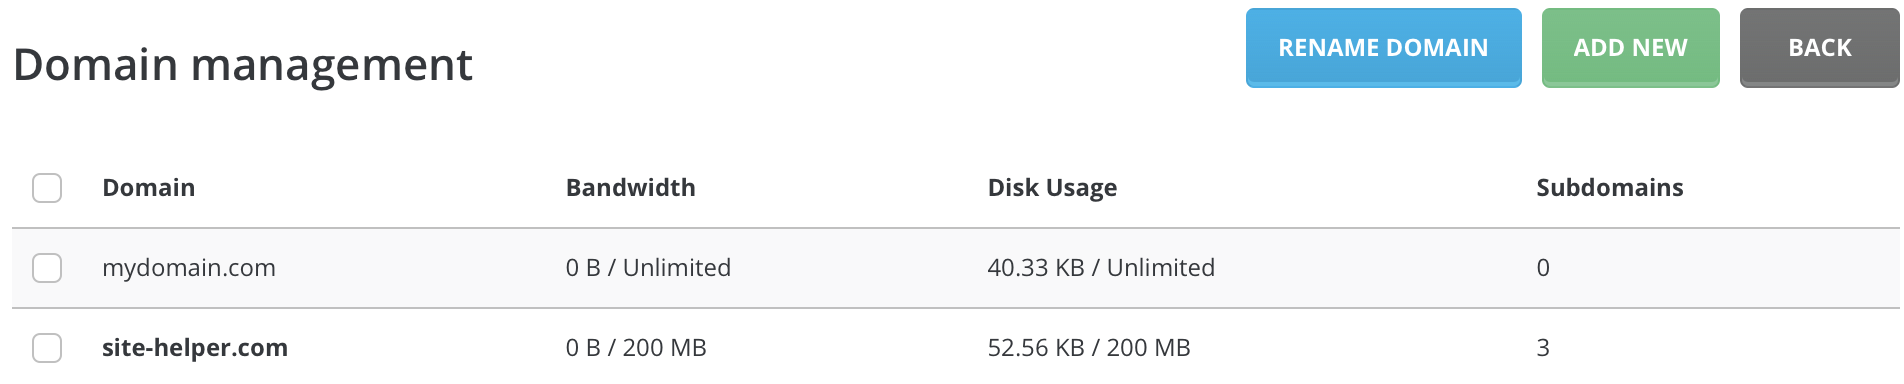
Hosting Additional Domains
To see all your current domains, sign into the control panel and then click on the "Account Manager" icon, followed by the "Domain Setup" link.
You can see all your listed domains from here. Also, you can add new domain or rename an existing one. To host an additional domain, click the "Add New" button at the top of the page.
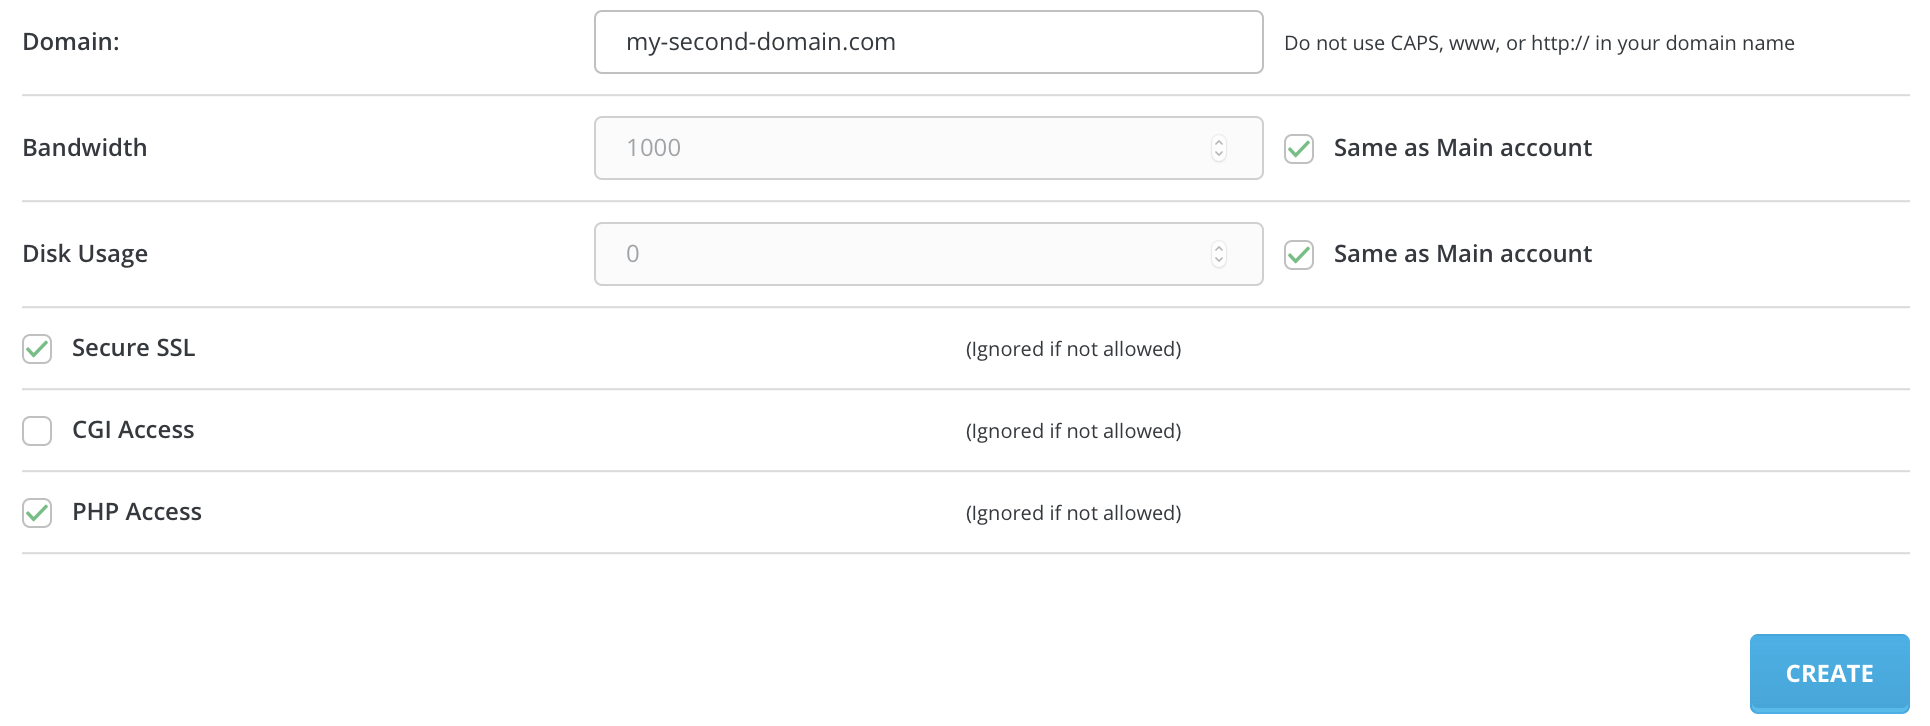
First, enter the domain name. Use all lower-case characters. You do not need to enter "http://" or "www."
Second, select the bandwidth and disk usage available to this domain. If you only want 1 gig of transfer per month, enter 1000 into the "Bandwidth" field. If you want to share bandwidth with your main domain, without limit, then check the "Same as Main Account" box. Finally, click "Create."
You can also choose what access your website will have. Click only if you know what you are doing, otherwise just leave it default.
Make sure to edit the record of the new domain so that it uses the same name servers as your main domain (this is done through the domain registrar). It may take up to 72 hours for the new domain to resolve.
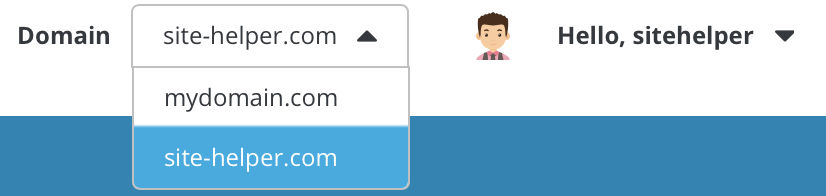
Signing in to the Control Panel
Log in to the control panel as you always have. You will see a choice of the domains hosted on your account. Click on the domain you want to work with.
Uploading Files to Each Domain
Uploading files to each domain is very simple. When you use FTP or the control panel's built in file manager, go to the domains directory and then choose the domain you want to upload to.
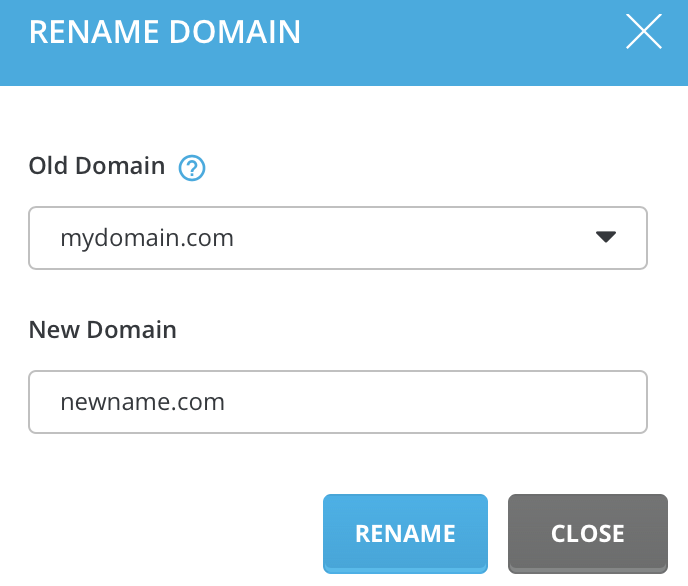
Renaming a Domain
You can change the name of a domain from domain1.com to domain2.com. Simply click "Rename Domain" button.
Then select old domain from the list.
Enter a new desired domain name (without "www" or "https://") and click "Rename".