A purchased certificate is the best form of security. Because the certificate is both secure and trusted, visitors will not receive a warning popup window when viewing a secure page.
Step 1: Generate a CSR
Make sure to click the radio button next to "Create A Certificate Request."
Then, enter the information about your company.
The "Common Name" refers to the address of your site that will go on the SSL certificate.
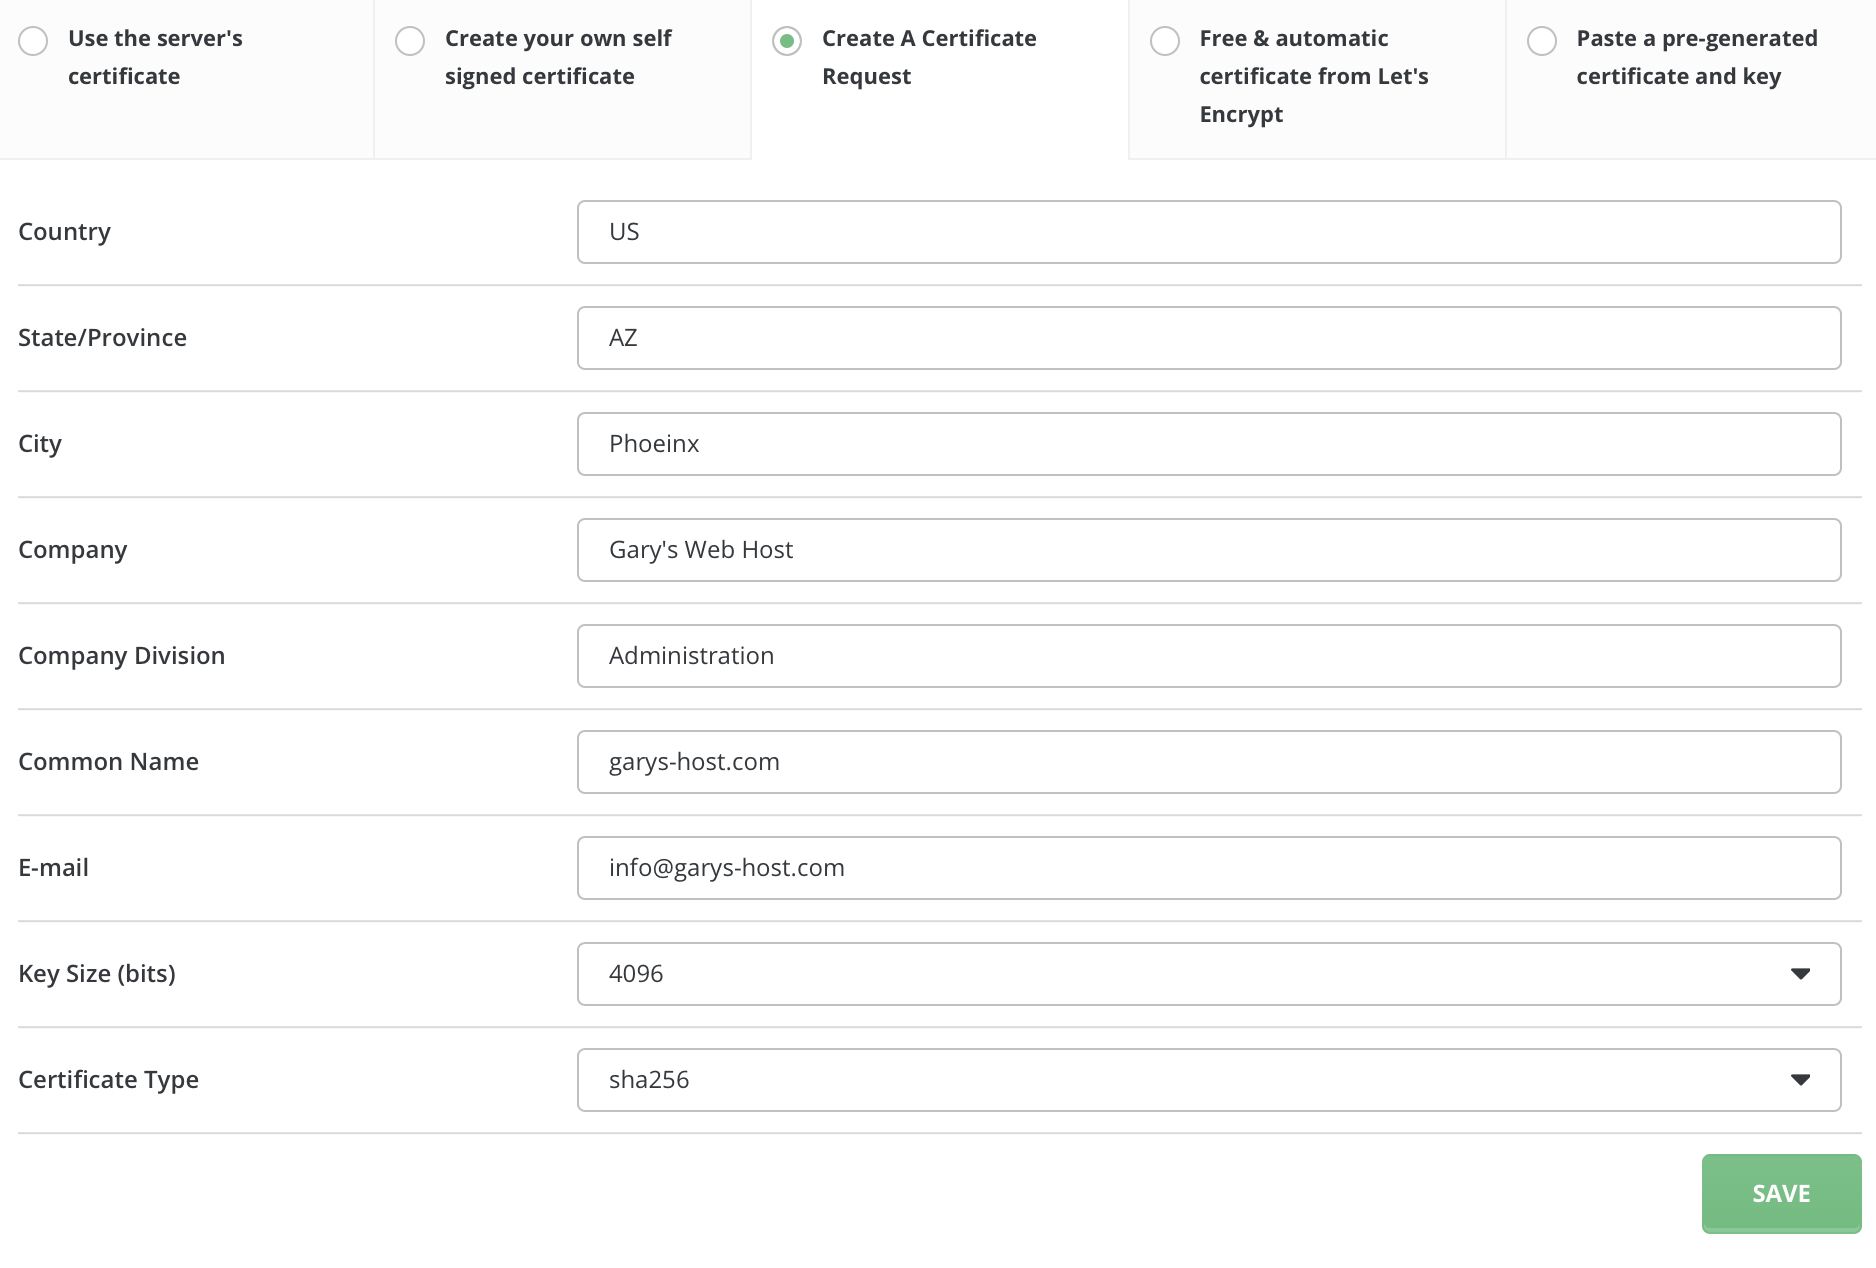
Your site will be secure only at this address. In the above example, https://garys-host.com/anything would be valid, but not https://www.subdomain.garys-host.com.
When you are finished, click the "Save" button at the bottom of the screen. You will then see a page that looks like this:
Copy this text (including the "BEGIN/END CERTIFICATE REQUEST" sections) into a plain text editor such as Windows Notepad and save the file to your hard drive. You will need this CSR when you purchase a certificate.
Step 2: Purchase a Certificate
When purchasing a certificate, you will be asked about yourself or your company, your website, and:
- the CSR
- the software that generated the CSR
- your common name
The CSR
Simply paste the CSR given to you by the control panel, including the "BEGIN/END CERTIFICATE REQUEST" sections. There will be a text box in the order form to paste to. Please ensure the CSR is saved and pasted as plain text.
Software that Generated the CSR
Choose Apache-ModSSL("OpenSSL"), or "Other" if you don't see Apache-ModSSL in the list. Do not worry about making a mistake, as this information is collected for statistics purposes only.
Your Common Name
The "Common Name" refers to the address of your site that will go on the SSL certificate (see Step 1). Enter this address without the "http://" unless otherwise specified by the certificate seller.
Step 3: Install a Certificate
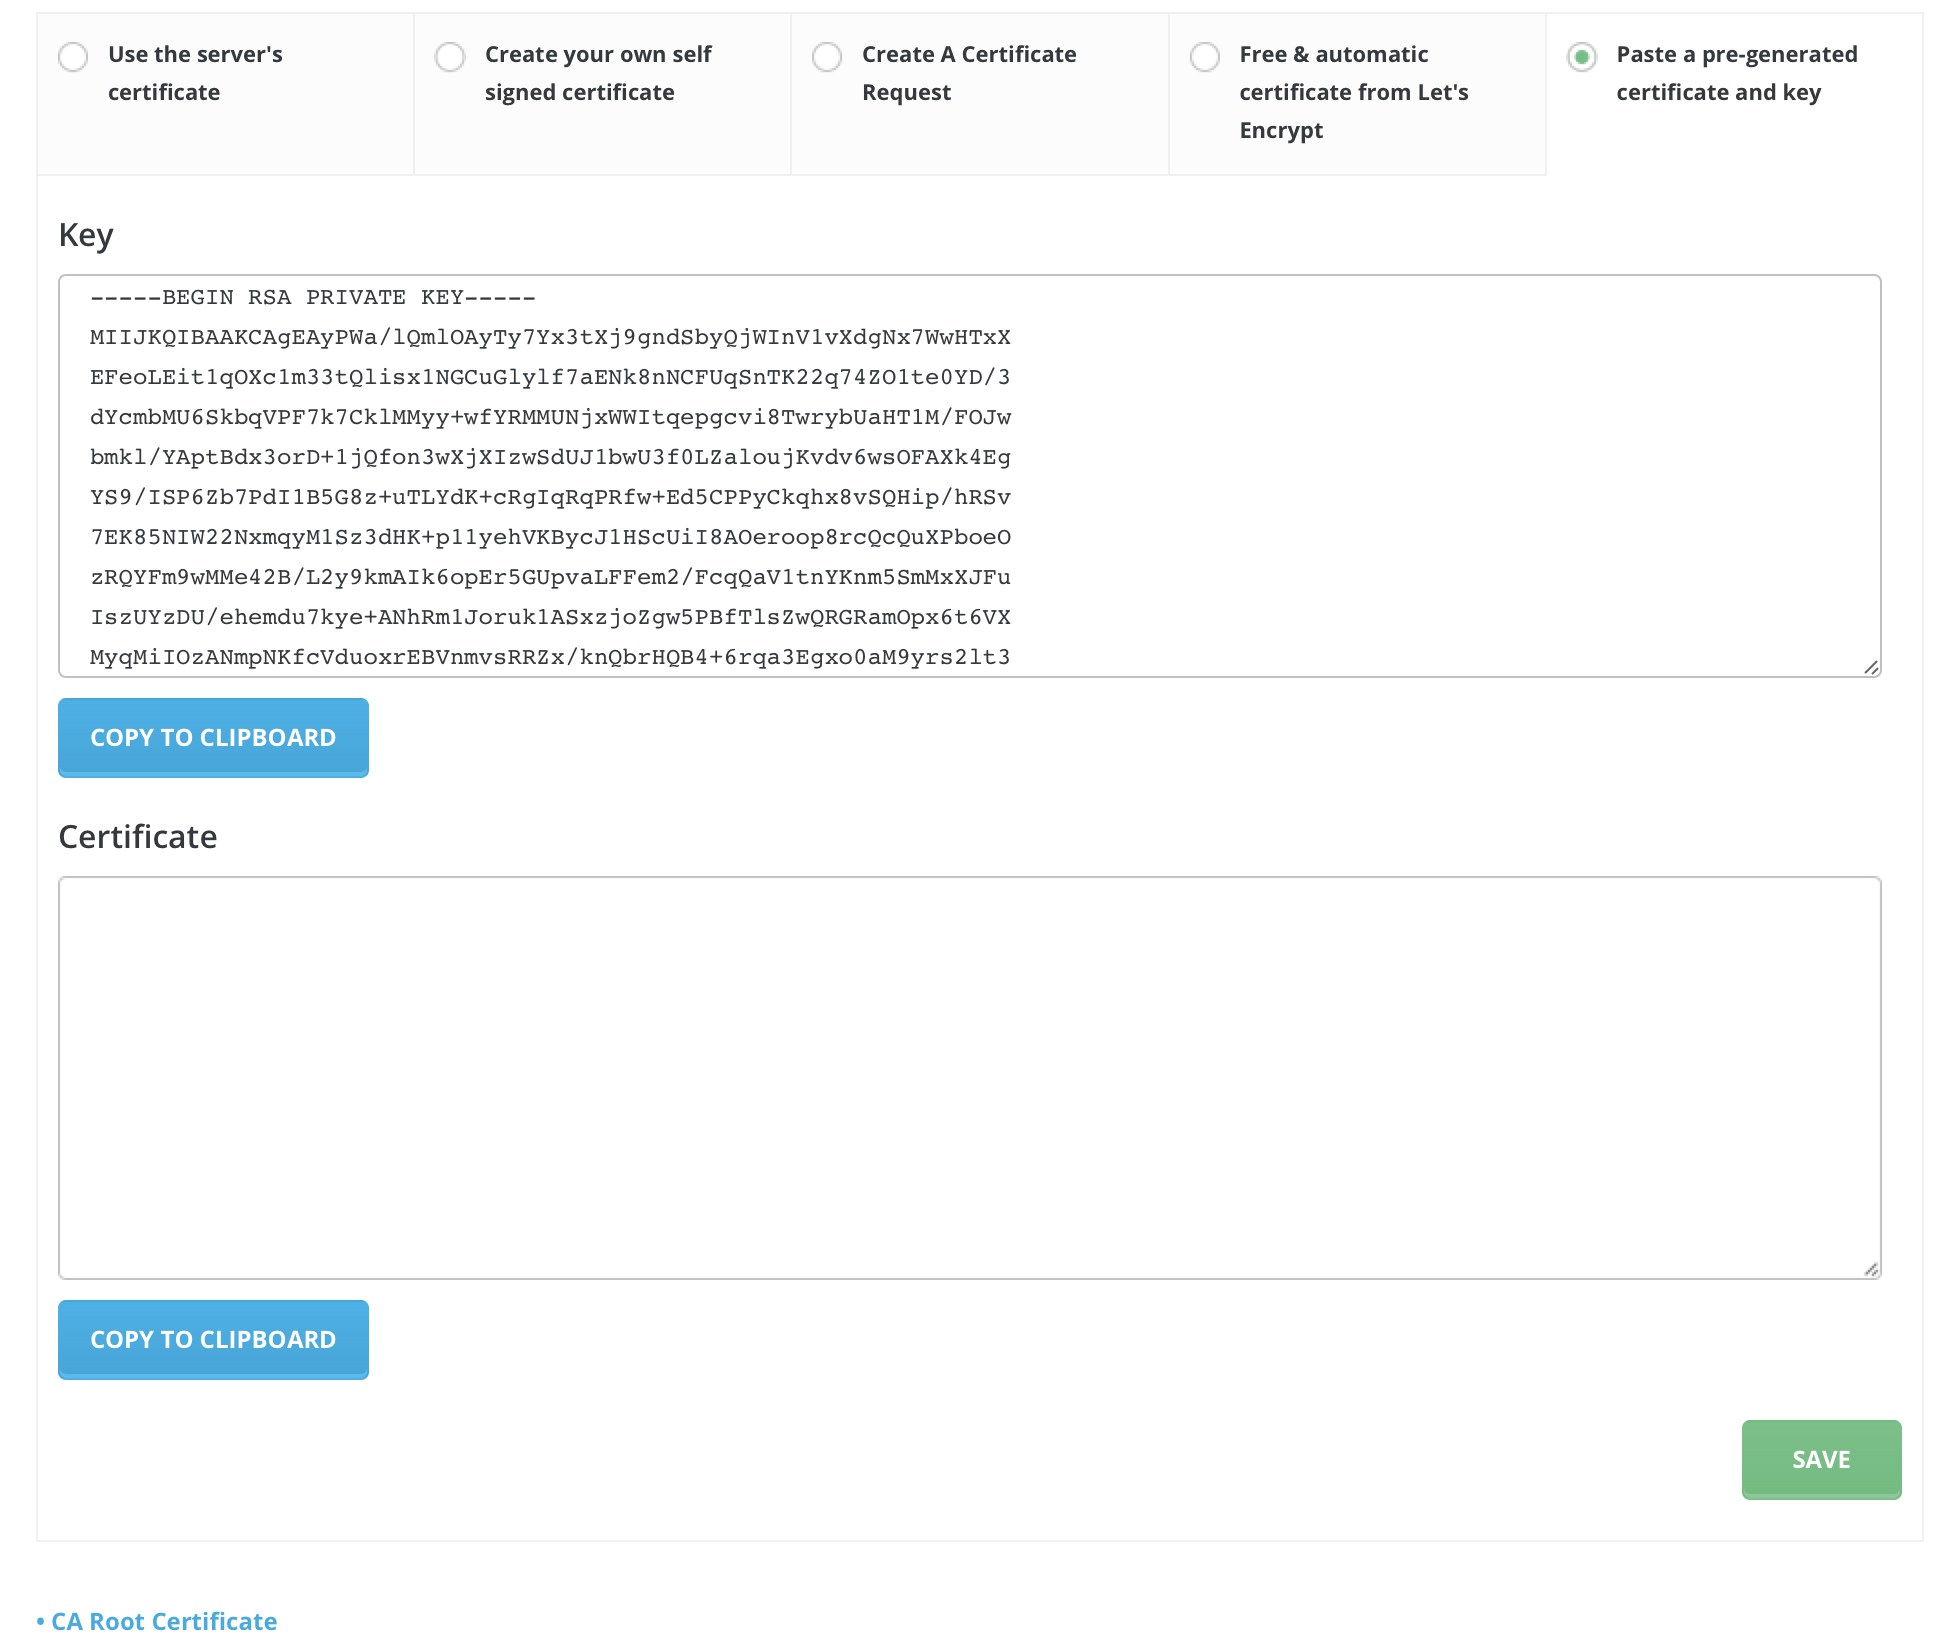
Select the radio button next to "Paste a pre-generated certificate and key."
As you can see, the key is already inserted in the text box for you.
Paste the certificate immediately in "Certificate" box below it and click "Save."
The domain's certificate might be named domain.com.crt
Step 4: Install the CA Root Certificate
In picture above you can see "CA Root Certificate" link. Click on the link and paste your CA Root Certificate in the textbox. Also, click "Use a CA Cert" box above. Then, click the "Save" button.
Important: Remember to check the "Use a CA Cert." box.
Although the installation of a CA Root Certificate is not always required, you may find that your SSL certificate will not function properly without completion of this step.
The CA Certificate may be sometimes called the gd_bundle.crt, ca_bundle.crt, ca_cert, etc..
Note: Do not forget to setup private_html .
